 Skip to content

You’ve spent hours tempering chocolate, perfecting your ganache, and hand-crafting each piece. Then you wrap it in cling film, pop it in a sandwich bag — and suddenly it looks like a packed lunch, not a luxury gift.
Poor packaging doesn’t just hurt presentation. It can ruin texture, accelerate melting, and let in the moisture and odours that destroy carefully crafted flavour. Whether you’re gifting to a friend, selling at a local market, or building a small confectionery brand, the way you package your chocolates matters just as much as how you make them.
This guide covers everything you need to know — from the science behind chocolate preservation to practical DIY wrapping ideas and the best packaging materials available in the UK.
Why Proper Chocolate Packaging Matters
Chocolate is surprisingly delicate. It melts at around 30–32°C (lower than body temperature), which means even a warm hand or a car dashboard in summer can cause serious damage. But temperature is only one of three major threats.
The Three Enemies of Chocolate
1. Moisture Chocolate is hygroscopic — it absorbs moisture from the air. When moisture hits the surface, the sugar crystals dissolve and recrystallize, leaving behind a white, powdery film known as sugar bloom. It doesn’t affect taste, but it looks unappealing and signals poor storage.
2. Oxygen Oxidation causes cocoa butter to turn rancid over time. This produces an off, stale flavour — especially noticeable in dark and milk chocolates with higher fat content. A proper oxygen barrier in your packaging dramatically extends shelf life.
3. Light UV light degrades cocoa’s natural antioxidants and accelerates fat oxidation. Chocolates stored in clear, unprotected packaging in a sunny window can go stale in days.
Good packaging blocks all three. It also signals quality to the recipient — especially important if you’re selling or gifting your creations.
How to Package Homemade Chocolates: A Step-by-Step Guide
Step 1: Let Chocolates Set Completely
Never package warm or slightly soft chocolates. Allow them to fully crystallise at room temperature (ideally 16–18°C) or in the fridge. Packaging prematurely traps condensation inside, leading to bloom.
Step 2: Handle with Care
Use food-safe gloves or chocolate-dipping forks to handle individual pieces. Fingerprints transfer heat and moisture, and can leave marks on a glossy finish.
Step 3: Wrap Individual Pieces (If Needed)
For loose truffles or bars, wrap each piece individually in food-grade foil or confectionery tissue. This prevents pieces sticking together and provides a first layer of protection.
Step 4: Choose the Right Outer Packaging
Select a box, bag, or wrap that suits your purpose — gifting, selling, or storing. Match the material to the environment (see the next section for guidance).
Step 5: Add Inserts and Dividers
If using a box, add moulded plastic trays, card dividers, or candy cups (petit four cases) to keep chocolates separated and prevent movement during transit.
Step 6: Seal Properly
For maximum freshness, seal the package with tape, ribbon, a heat-sealed bag, or a properly fitting lid. Avoid leaving gaps where air can circulate freely.
Step 7: Label Correctly
If you’re selling, UK food law requires ingredients, allergens (in bold), best-before date, net weight, and business name/address. Even for gifts, a simple label listing allergens is considerate and responsible.
Best Materials for Chocolate Packaging
Choosing the right material is the most important decision you’ll make. Here’s an honest breakdown of the main options.
Aluminium Foil Wrap
Best for: Individual chocolates, bars, truffles
Pros: Excellent barrier against moisture, oxygen, and light; food-safe; keeps shape; classic premium look
Cons: Not eco-friendly unless recycled; can tear if handled roughly; limited branding options
Foil is the gold standard for individual chocolate wrapping. It was adopted by confectionery brands for good reason — it provides all three essential barriers in a single layer. Use embossed or coloured foil to add a premium feel.
Paperboard Boxes
Best for: Gifting, retail, sets of multiple chocolates
Pros: Fully printable for branding; rigid and protective; recyclable; wide range of styles (magnetic closure, window boxes, drawer-style)
Cons: Paperboard alone doesn’t provide moisture or oxygen barriers — needs to be combined with foil lining or inner tray
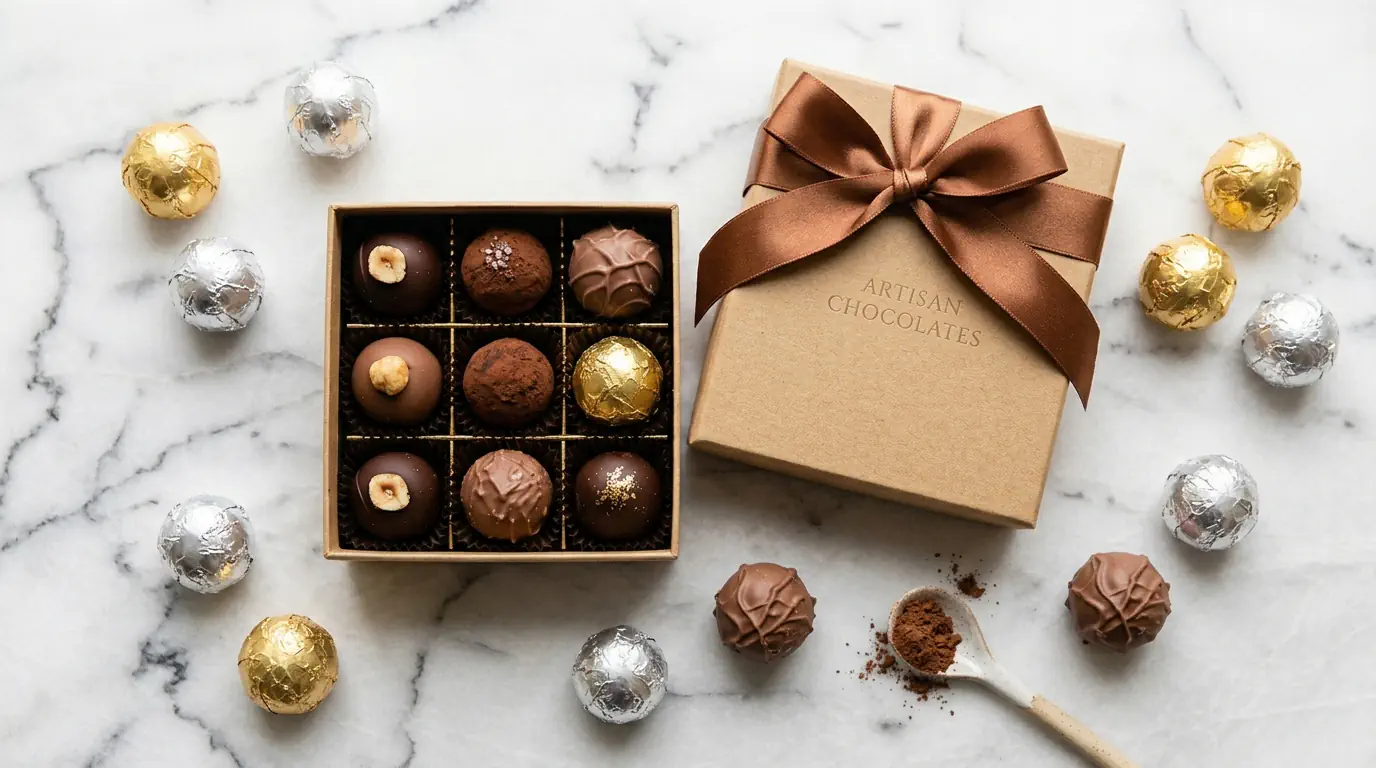
A well-designed box transforms a product. For anyone building a chocolate brand in the UK, printed chocolate boxes are the most effective tool for creating a memorable first impression. Pair them with inner candy cups and a foil liner for full protection.
Kraft Paper
Best for: Rustic, eco-conscious gifting; wrapping chocolate bars; outer wrapping
Pros: Fully recyclable and biodegradable; popular with eco-conscious consumers; natural aesthetic; inexpensive
Cons: Minimal barrier properties on its own; not moisture-resistant without lining; can absorb odours
Kraft paper is excellent for the outer layer of a gift-wrapped bar or as a secondary wrap over foil. It pairs well with twine, wax seals, and dried flower decorations for a handmade aesthetic. Look for food-safe kraft paper if it will be in direct contact with chocolate.
Cellophane / OPP Bags
Best for: DIY gifting, market stalls, small batches
Pros: Transparent (shows off the product); inexpensive; heat-sealable; decent moisture resistance
Cons: Poor oxygen barrier compared to foil; not biodegradable (unless using bio-cellophane); looks less premium
Cellophane bags are a popular choice for home-based chocolate makers. They work well for clusters, bark, and decorative chocolates where visual appeal is part of the product. Tie with a ribbon and add a printed tag for a polished, gift-ready look.
Food-Grade Plastic Trays and Inserts
Best for: Inner structure in gift boxes; multi-piece presentations
Pros: Keeps chocolates in place; available in multiple configurations; easy to source
Cons: Not eco-friendly; single-use; adds cost
These trays are not packaging on their own — they work inside a box to create a professional, organised presentation. Consider pulp fibre inserts as a biodegradable alternative that still holds chocolates securely.
How to Wrap DIY Chocolates at Home: Creative Ideas
You don’t need industrial equipment to create beautiful, gift-worthy packaging. Here are practical DIY ideas that look professional with minimal investment.
The Classic Foil-Wrapped Truffle
Cut a square of coloured foil (available from cake decorating suppliers). Place the truffle in the center, gather the foil upward, and twist at the top. For a polished finish, smooth the foil tightly to the shape of the chocolate before twisting.
Kraft Bar Wrap with a Belly Band
Wrap a chocolate bar in foil first, then cover with a piece of kraft paper folded neatly at the back. Slide a printed paper belly band around the middle. This technique mimics commercial bar packaging at a very low cost and looks genuinely premium.
Ribbon-Tied Cellophane Bags
Fill a clear cellophane bag with truffles, clusters, or bark pieces. Push out excess air, fold the top over twice, and secure with a satin ribbon tied in a bow. Add a handwritten or printed gift tag for a personal touch.
Mini Gift Boxes with Candy Cups
Purchase small rigid boxes (widely available from UK packaging suppliers and craft shops). Line the base with tissue paper, place candy cups inside, and set one chocolate per cup. Close the lid and finish with a ribbon or wax seal.
Window Box Presentation
A box with a clear window panel lets the chocolates speak for themselves. This works especially well for colourful bonbons or moulded chocolates with decorative patterns. No additional inner wrapping is needed — the visual impact sells the gift.
Best Packaging for Homemade Chocolate Gifts in the UK
Gift packaging requires an extra layer of thought. The packaging isn’t just protecting the chocolate — it is part of the gift.
What Makes Chocolate Packaging Giftable?
- Presentation: The packaging should excite the recipient before they even open it
- Tactile quality: Weight, texture, and structure signal value
- Personalisation: Names, messages, and custom printing make gifts memorable
- Sustainability: An increasing number of UK consumers prefer recyclable or reusable packaging
Packaging Ideas for UK Gifting Occasions
Christmas: Deep red or forest green magnetic closure boxes with gold foil stamping. Add a personalised insert card.
Valentine’s Day: Heart-shaped boxes, blush pink cellophane with red ribbon, or a window box showing pink-dusted truffles.
Corporate Gifts: Branded boxes with your company’s logo, colour palette, and a consistent design language across all pieces.
Wedding Favours: Small kraft boxes or organza bags with a personalised thank-you label, tied with twine or ribbon.
Easter: Egg-shaped boxes or kraft cartons with spring-toned tissue paper and dried flower decoration.
If you’re producing chocolates at any kind of scale — for markets, events, or as a growing brand — investing in custom chocolate gift packaging boxes is one of the highest-return decisions you can make. Consistent, branded packaging builds recognition, increases perceived value, and creates a memorable unboxing experience that encourages repeat purchases and word-of-mouth referrals.
Common Mistakes to Avoid
Even experienced home chocolatiers make these errors. Knowing them in advance saves product, money, and reputation.
Packaging chocolate while it’s still warm Always allow chocolates to fully set before packaging. Trapped heat causes condensation inside the package, which leads to bloom and stickiness.
Using non-food-safe materials Not all paper, foil, or plastic is food-safe. Always check that materials are certified for direct food contact, especially if you’re selling your chocolates.
Ignoring the storage environment Beautiful packaging is undone by poor storage. Keep packaged chocolates away from strong odours (cheese, onions, spices), direct sunlight, and temperature fluctuations. The ideal storage temperature is 15–18°C at relative humidity below 55%.
Choosing packaging that doesn’t fit Chocolates that rattle around inside a box arrive damaged. Use appropriately sized boxes and inner inserts that hold pieces snugly.
Skipping allergen labelling In the UK, the 14 major allergens must be clearly declared on any food you sell. Milk, soya, nuts, and gluten are commonly present in chocolate. Failure to label correctly is not just poor practice — it’s a legal risk. Refer to the Food Standards Agency allergen labelling guidance for full compliance requirements.
Over-relying on aesthetics at the expense of protection A beautiful box that lets in air and moisture is still a bad choice. Always balance visual appeal with functional barrier properties.
Conclusion
Packaging homemade chocolates well is part craftsmanship, part science, and part storytelling. The right materials protect your work from the elements; the right design communicates your care, quality, and personality.
Start with the basics: let chocolates set fully, use food-safe materials, protect against moisture, oxygen, and light, and size your packaging appropriately. From there, layer in the creativity — foil, kraft, ribbon, belly bands, window boxes — whatever fits your aesthetic and audience.
If you’re ready to take your presentation to the next level, professional packaging is closer and more affordable than most people expect. Whether you’re a home baker gifting to family or a small UK brand preparing for your first market, the right box makes every piece of chocolate feel like it’s worth unwrapping slowly.
Frequently Asked Questions
What is the best packaging for homemade chocolate?
For individual pieces, food-grade foil provides the best all-round protection against moisture, oxygen, and light. For gifting sets, a rigid paperboard box with inner candy cups and a foil liner is the most professional and protective option.
How do I stop homemade chocolates from melting in the packaging?
Ensure chocolates are fully tempered and set before packaging. Store them at 15–18°C away from heat sources. Avoid packaging in areas with direct sunlight or near cooking appliances. For transport in warm weather, use insulated pouches or cold packs.
Can I use cellophane bags for homemade chocolates?
Yes, cellophane bags are a practical and affordable option, particularly for home gifting and small market stalls. They’re not the strongest oxygen barrier, so they’re best used for short shelf-life chocolates that will be consumed within a week or two.
Do I need to label homemade chocolates if I sell them?
Yes. UK food law requires you to display ingredients, allergens in bold, best-before date, net weight, and your business name and address. Even for informal sales, allergen information is a legal obligation.
What packaging is best for posting chocolates in the UK?
Use a rigid outer box to prevent crushing, with inner inserts to prevent movement. Wrap individual pieces in foil for moisture protection. Avoid posting during very warm weather, or use insulated packaging with cold packs for warm-season deliveries.
For UK-based chocolate makers looking for premium, customisable packaging solutions, explore the full range at British Custom Boxes.